Regions Help & Support
HOW TO
Set Up Automatic Payments
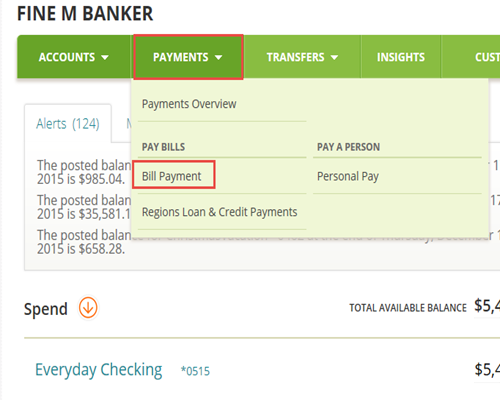
Step 1
Once logged in to Online Banking, select the Payments menu and then Bill Payment.
Step 2
Locate the bill you want to set up automatic payments for, and select AutoPay, then Set Up AutoPay.

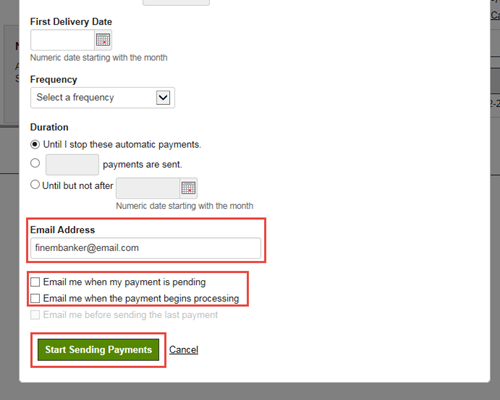
Step 3
On the Manage AutoPay page, select your preferences for payment account and amount, delivery date, frequency and duration.

Step 4
Verify your email address is correct, select your notification preferences, and then Start Sending Payments.
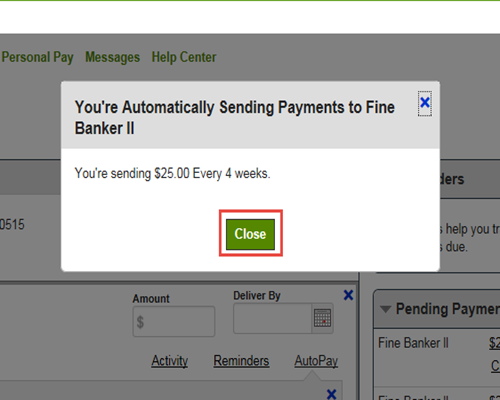
Step 5
A confirmation message will display your AutoPay information. Select Close to go back to your Payment Center.
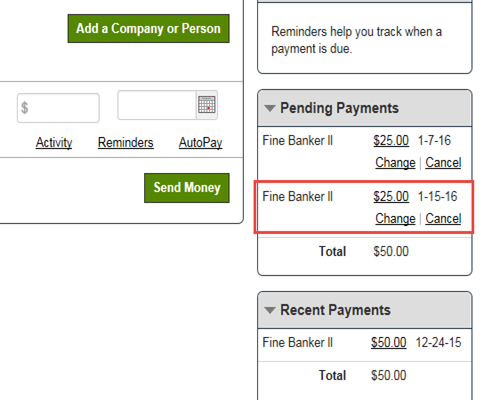
Step 6
Your scheduled automatic payment will appear in the Pending Payments section.